Load and edit values
To load and edit values:
- Make sure you have opened the Data Utility tool at the correct hierarchy node.
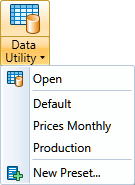
- Click the arrow under the Data Utility button
 to see the presets which have been added to the quick launch list (see the screenshot below for an example); select a preset
from the list. If you click the icon area of the Data Utility button then the default preset will be used.
If no preset exists, you will be prompted to create one (see Data Utility presets).
 -
If you want to make sure that you edit all values from a document, check the Link Selections box on the ribbon. This will tie together variables on the Periodic and Scalar tabs which belong to the same document; this is done based on the document ID. It works as follows:
- If one or more periodic variables are selected from a given document, the matching row(s) on the Scalar tab will also be selected.
- If a variable is selected on the Scalar tab, all the periodic variables for that document will also be selected on the Periodic tab.
- If all of the periodic variables for a given document are de-selected, the matching row(s) on the Scalar tab will also be de-selected.
- If a variable on the Scalar tab is de-selected, all of the periodic variables for that document will also be de-selected.
- Click the Load button
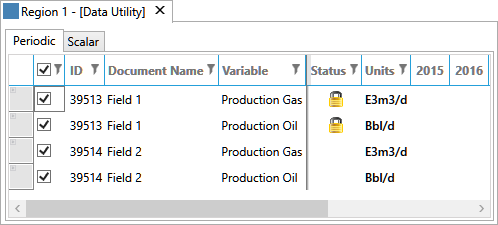
 on the ribbon to retrieve data from documents. The Periodic and Scalar tabs will be filled with the current data values. If there are discrepancies between the document's settings and the preset's settings, or the loaded document is in use, a warning will be displayed in the Status column; the image below shows an example of a locked document warning. Move your mouse over the warning icon to see the explanation.
 - If required, you can make changes to the load settings and re-load data by clicking the Load button
 again. You can also re-load only some of the currently-displayed items: use the check boxes
next to their names, click the arrow underneath the Load button and choose the Load Selected option.
 - Edit the values: you can use CTRL+C and CTRL+V keyboard shortcuts to copy and paste values. The import/export function can also be used (see Export to clipboard and Import from clipboard).
- To apply the changes, select the rows you have edited and click the Submit button
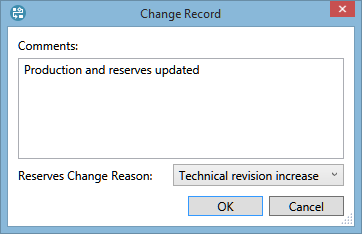
 on the ribbon. You will be asked to enter information for a change record. If you are
updating reserves variables, you can also select a reserves change reason. Click OK to proceed.
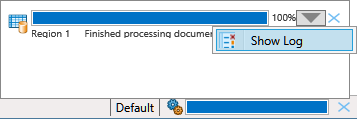
 - The task notification area at the bottom of the screen will show the progress of the operation. Move the mouse over it to view details, as shown below.
To cancel the operation, click the
 button
next to it.
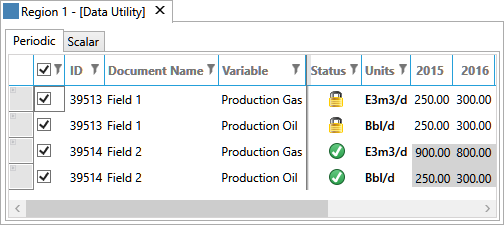
 - After changes have been applied, the Status column will be updated to show the results (see the example screenshot below). If you received an error, move your mouse over the icon to see the explanation; errors can happen if, for example, a document was updated by another user after you loaded the data or if the document is opened by you or another user.
- To view the details about the update process, you can open the log. Move the mouse over the task notification area and the list of completed tasks will be displayed as shown below. Click the arrow button next to a task and select the Show Log option.
Note: When you check the Link Selections box, variables will be linked only after you select or de-select displayed variables. The same applies when you uncheck the box.
Note: The Data Utility tool cannot be used to update variables which are defined by expressions within documents or consist of other items.
Note: Revisions will only be created for the selected documents if their values have been updated.

