Once you have configured your approval definitions, use the Approval Management page to configure and initialize approvals.
Recall that Reserves takes a snapshot of your security configuration and the current state of your data each time you create an approval. This snapshot of your data and security configuration is used to drive your approval. If the data used in the approval changes (i.e. new users are added to your configuration, users are ascribed different permissions, changes are made to reservoirs included in the approval, ... etc.) the approval will need to be deleted and relaunched in order to include this new information in your approval.
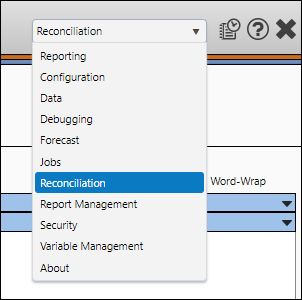
- Select Reconciliation from the Navigation Toolbar.
- Click on the Approval tab, and then the Approval Management page.
What you can do on this Page
Create (Initialize) an Approval
To create a new approval, follow these steps:
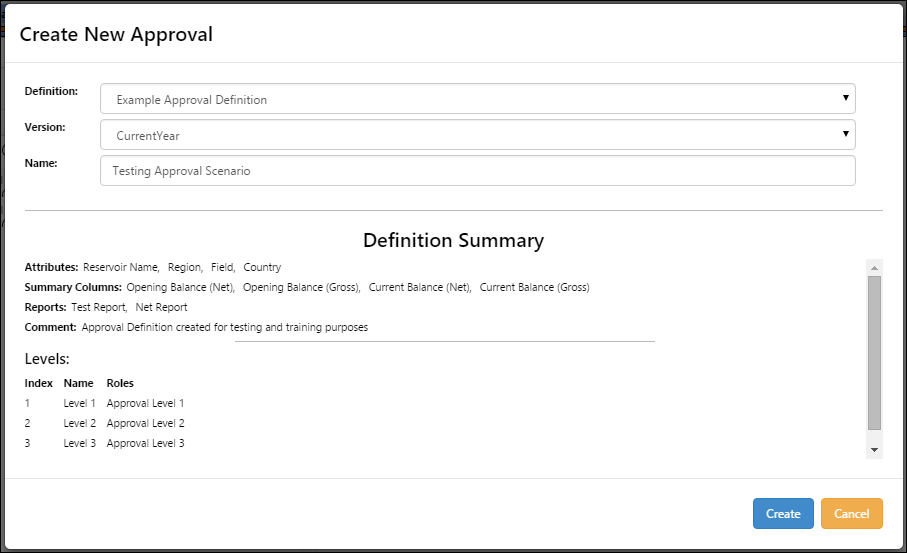
- Click the Create Approval button. The Create New Approval window will open.
- You will need to configure 3 options to create your approval:
- Select an approval definition from the Definition drop-down menu. A summary of your approval definition will be displayed at the bottom of the window (visible above).
- Select the version that contains the data you wish to include in your approval using the Version drop-down menu.
- Enter a name for your approval in the Name field.
- Once you have configured your approval's options, click the Create button. When your approval has been created successfully, it will be added to the table displaying all of your approvals.
- Click on Information icon (
 ) in the Definition column to review the approval definition associated with each one of your approvals.
Click image to expand or minimize.

Click image to expand or minimize.
Approvals will fail to initialize if:
- No users are assigned to an approval role used in your approval definition. A minimum of one user must be assigned to each role included in your approval definition.
- Any data included in the version selected for the approval is not accessible to any of the roles used in the approval definition.
- The name of your approval is not unique. Approvals with names matching other active approvals will not work.
Create a Comparison Instance of your Data
After creating approvals, you can create comparison instances of your approval data.
To create a comparison instance of the data in your approval, follow these steps:
- Click on the Create Comparison Instance button (
 ) in the Version column of the table.
 - A comparison instance will be generated. Two new icons will be visible in the Version column of the table:
- Refresh Comparison Instance (
 ): Use this button to update the data in your comparison instance. Hover your cursor over this button to view the last updated times of your version and comparison instance.
 - Compare Data (
 ): Click this button to compare the current state of your data with the comparison instance of your data. For a more complete description of comparing data, see the next topic on this page.

- Refresh Comparison Instance (

Compare Approval Data
Once your approval has been initialized and a comparison instance has been created, you can compare the current state of your data with the data in your comparison instance.
To compare data in your approval to the data in your comparison instance, follow these steps:
- Click the Compare Data (
 ) button in the row of the table corresponding with your approval.
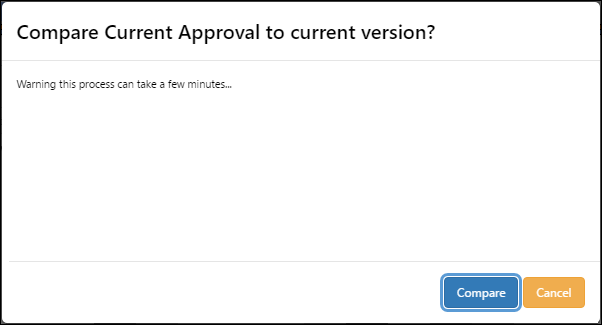
 - You will be prompted to confirm the comparison. Depending on how much data is in your approval and in the version of your data used to drive the approval, comparisons can take some time. Click the Compare button to create your comparison.
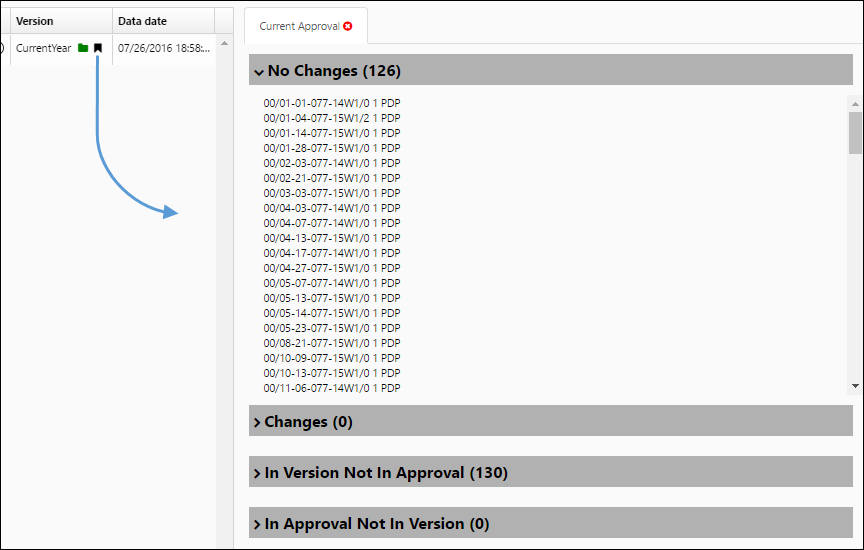
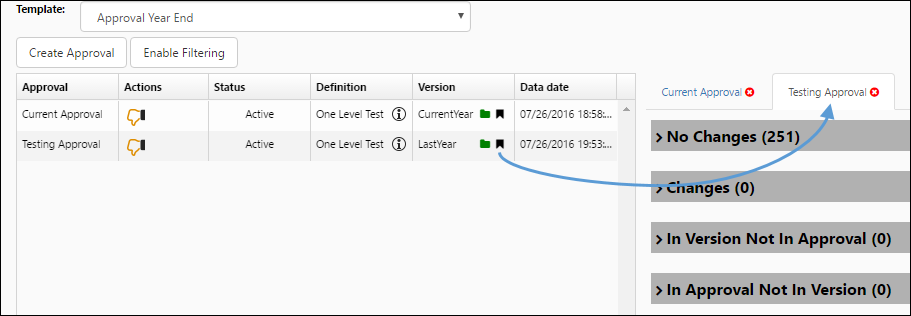
- When the compare process is completed, a summary of the comparison will be displayed to the right of the table.
- The comparison will organize data changes into four categories:
- No Changes: The data associated with objects listed in this pane is identical in the current state of the objects, and the comparison instance.
- Changes: The data associated with objects listed in this pane does not match the data in the comparison instance; the data in your version has changed since your approval started.
- In Version Not In Approval: Objects listed in this pane exist in the version of your data in which you are working, but have not been submitted to the approval.
- In Approval Not In Version: Objects listed in this pane have been previously submitted for approval, but have been removed from the version of your data since you created your comparison instance.
- You can open more than one comparison at the same time. New comparisons will open in their own tab.

Click image to expand or minimize.
Click image to expand or minimize.
Click image to expand or minimize.
Finalize Approvals
If you have the appropriate permissions, you will be able to finalize approvals once they have been completed. To finalize an approval, follow these steps:
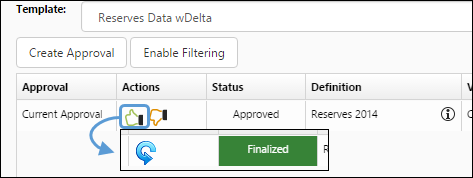
- Click on the Finalize (
 ) button in the Actions column of the table.
 - You can retract your finalization by clicking the Retract (
 ) button. The approval will return to an active state.
Click image to expand or minimize.
Once an approval has been finalized, the approval will be locked. This means that none of the users included in the approval will be able to perform any actions in the approval.
Reject or Delete Approvals
If you have the appropriate permissions, you will be able to reject and/or delete approvals. To do so, follow these steps:
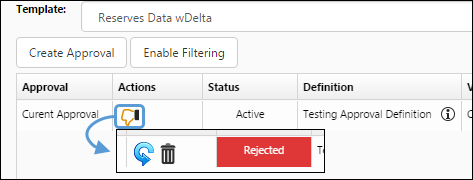
- Click on the Reject (
 ) button in the Actions column of the table.
 - Once an approval has been rejected, you will have the option to retract your rejection (effectively, reactivating the approval), or delete the approval entirely:
- To retract your rejection, click on the Retract (
 ) button.
 - Provided you have the appropriate permissions, you can delete rejected approvals completely by clicking on the Delete (
 ) button.
- To retract your rejection, click on the Retract (
Click image to expand or minimize.
Finalized and Rejected Approvals
Once an approval has been finalized or rejected, it will be displayed in the Finalized, or Rejected categories in the filters pane, on the Approvals page.
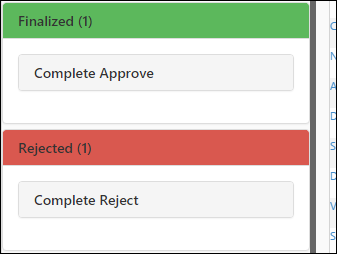
Clicking on the approvals will allow you to review them, but you will not be able to modify them. Reactivate approvals to make changes to them.
Submit Data to your Approval
Once your approval has been initialized, use The Approval Data Submission Page to add data objects to the approval process.
The Approvals Page
Once your approval is up and running, access The Approvals Page to work on your approval.
