
Before proceeding, remember that although Microsoft Excel can handle Table and Navigation models, Spotfire is only compatible with Table models.
Load OData with Spotfire
To load OData with Spotfire, follow these steps:
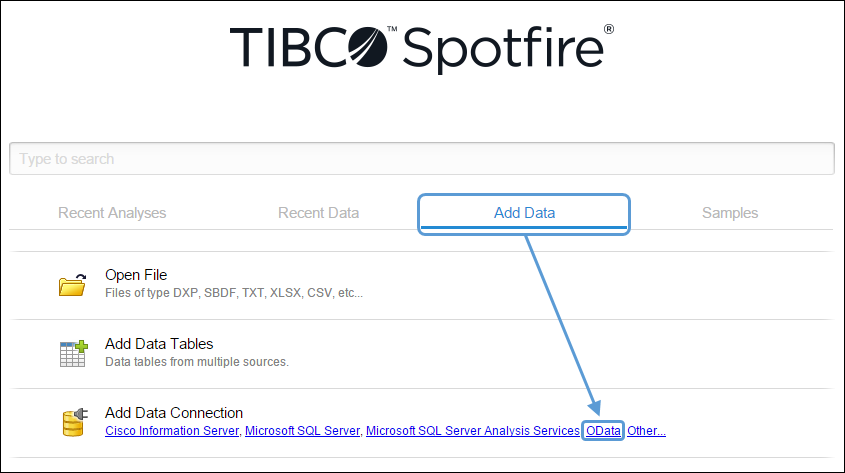
- When Spotfire opens, click on the Add Data tab, and select OData.
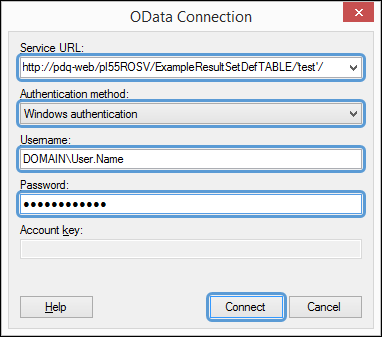
- The OData Connection window will open. Set up your connection options:
- Copy an OData URL from the Instance Manager page, and add it to the Service URL field.
- Select Windows authentication from the Authentication method drop-down menu.
- Enter your domain and username in the Username field, and your password in the Password field.
- When you have finished setting up your connection options, click the Connect button.
- If the connection is successful, the Views in Connection window will open. Now, you will need to create a relation.
- Click on the Relations button near the left side of the window and select New Relation....
- When the New Relation window opens, follow these steps to set up a relation:
- Use the Foreign key table drop-down menu to select the first table you wish to link.
- Use the Primary key table drop-down menu to select the second table you wish to link.
- Use the two Column drop-down menus to select matching columns. Although there is likely more than one possibility, typically the ObjectId column will be used to link tables.
- When you have finished setting up your relation, click the OK button.
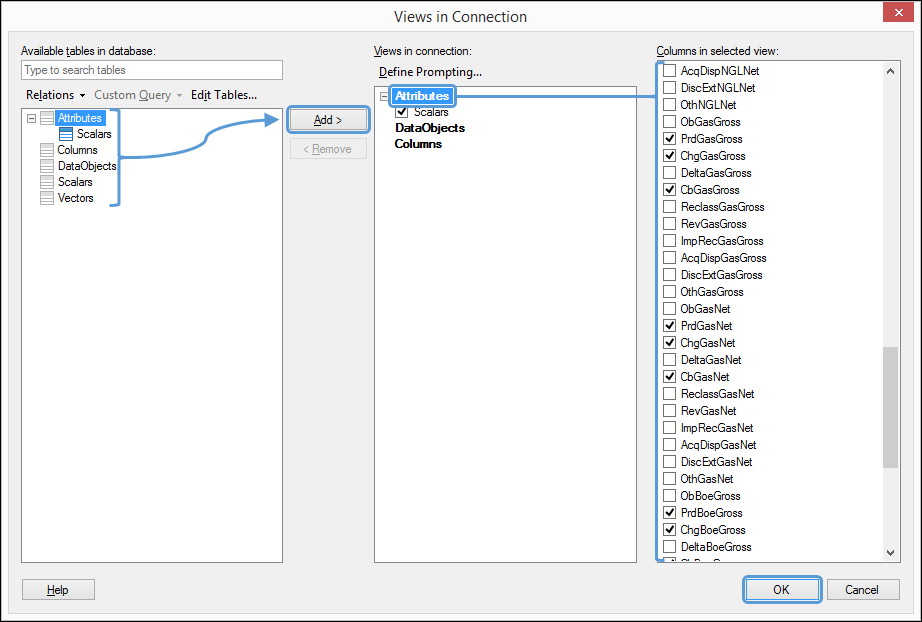
- Use the Views in Connection window to select the data you wish to download.
- Select the views you wish to download from the pane on the left side of the window, and click the Add > button to add them to the list of data you intend to download.
- Once you have selected your views, you can exclude specific attribute and variable values from the download. This is done by selecting a view in the Views in Connection pane, and then toggling checkboxes beside attribute or variable types in the Columns in selected view pane.
- When you finish selecting the data to download, click the OK button. Your data will be downloaded.
Click image to expand or minimize.
Click image to expand or minimize.
Relations allow Spotfire to link the primary keys of two tables in order to combine their data.

Click image to expand or minimize.
Click image to expand or minimize.
Create Charts with Spotfire
Once your data has been downloaded, use the Spotfire application to chart and visualize your data.
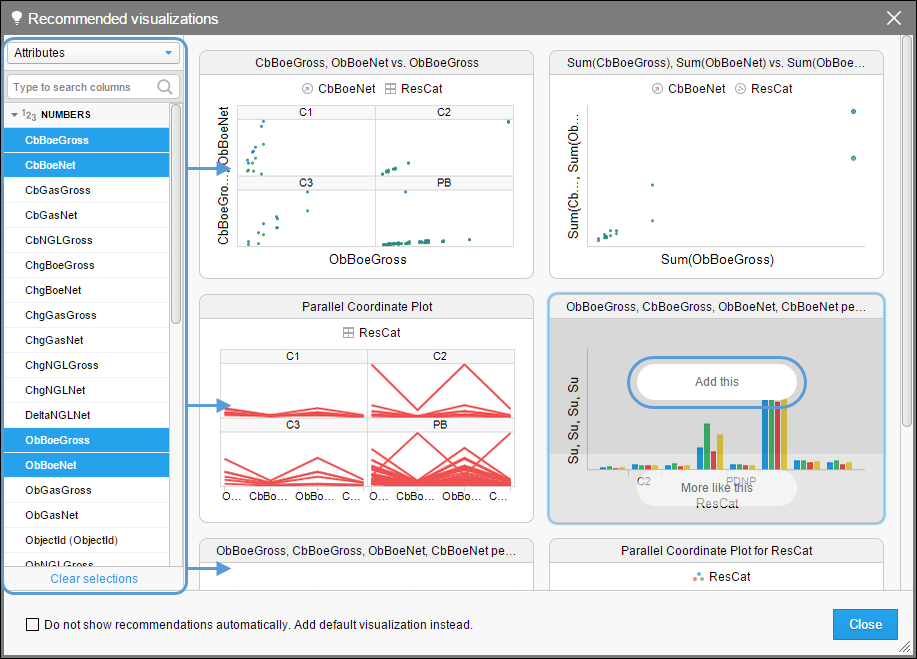
- When your data is downloaded, the Recommended visualizations window will open. You can use this window to quickly generate example visualizations and add them to your report.
- Select the data table you wish to graph using the drop-down menu near the upper right-hand corner of the window. In this example, Attributes will be used.
- The list of items on the right side of the screen will update with all of the objects included in the table you selected.
- Click on the items you wish to include in your graph. In this example, opening and current BOE volumes were selected, and categorized by reserve category (selected near the end of the attributes list off-screen).
- When you select all of the items you want to plot, hover your cursor over a visualization and click the Add this button to add the chart to your report.
- The Recommended visualizations window will close. You can reopen it at any time by clicking the button emphasized below.
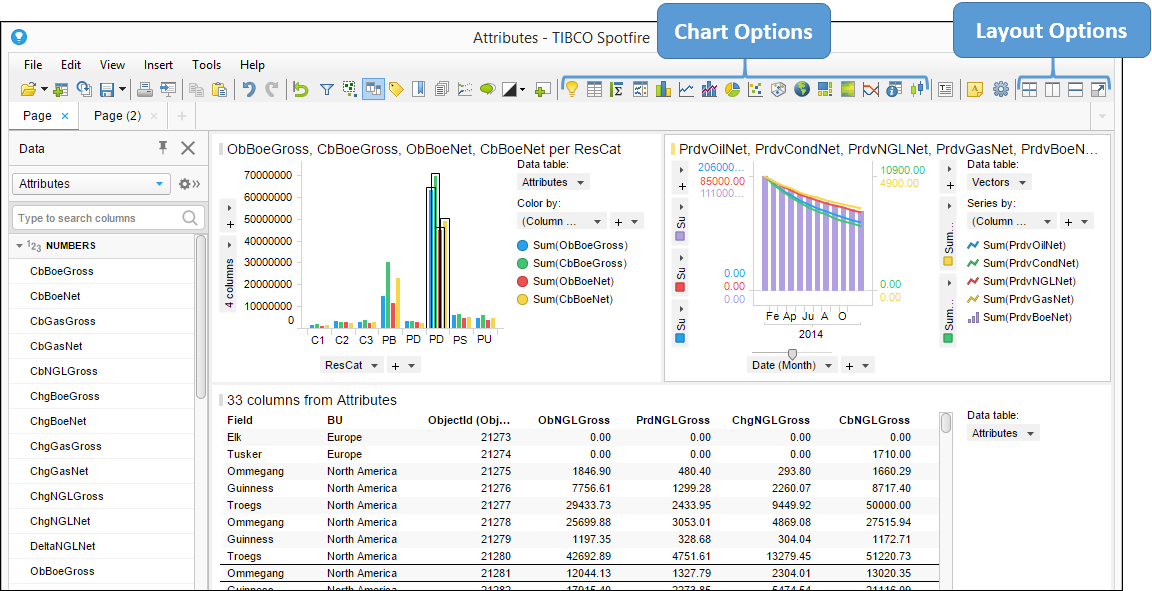
- All of the charts that you add to your report can be modified. You will be able to:
- Add columns to a chart
- Change color coding of your charts
- Change the data table to which your chart is linked
- To add more charts, either reopen the Recommend visualizations window, or choose a specific chart type to add to your report from the ribbon near the top of the screen.
- Modify the layout of your report by dragging and dropping charts, or use the layout icons near the top of the screen.
Click image to expand or minimize.

Click image to expand or minimize.
Additional Information
Spotfire User Documentation
For more information on working with Spotfire, see the TIBCO Spotfire Help file.