
Use the Multi Project Page (Multi Project Editor) to edit a variable's values for more than one project at a time. Use the Navigation Ribbon (visible below) to alternate between the 3 different parts of Editor:

- Select Reporting from the Navigation Toolbar.
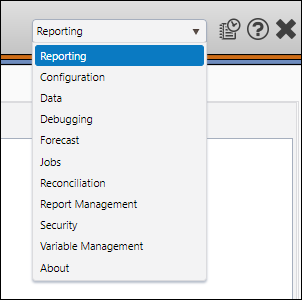
- Select Forecast from the Context drop-down menu in the Context/Report Selection.
- Click on the Forecast tab, and then the Multi Project page.
Edit Data
To modify variable values using the data editor, follow these steps:
- Use the hierarchy to select a group of projects you wish to work with, and then click on the level of your hierarchy that includes them to add your projects to the editor.
- Select the variable you wish to edit values for by:
- Selecting the variable group that includes the variable you wish to modify using the Variable Group drop-down menu.
- Selecting the variable you wish to edit using the Variable drop-down menu.
- Use the Unit drop-down menu above the upper-right hand corner of the table to select the units of values displayed in the editor.
- Click on the Edit button.
- Once your variable values are loaded, any of the variable values that are not totals (gray and white cells in the table) can be modified. To modify the value of a cell, double-click on the cell, enter your new value, and press ENTER on your keyboard. The color of the text in the cell you just modified will change to red. This indicates that the change you made has not been saved.
- Make any additional variable value changes you require.
- Once you have made all of the changes you require, click the Save button.
Adjust Editor Settings
Selecting Settings from the Navigation Ribbon will allow you to modify various settings associated with the editor.
To modify the editor's settings follow these steps:
- Select Settings from the Navigation Ribbon.
- Modify the editor's settings, as required.
- Once you have made changes, click the Apply button.
Each one of the editor's settings is described below:
Display Settings
Use the Decimals drop-down menu to control the precision of variable values displayed in the editor. For example, when 2 is selected, all variable values in the editor will be displayed with 2 numbers after the decimal (e.g. 621.12).
Date Settings
Use the date settings to control how the editor displays your data over time.
| Option | Description |
|---|---|
| Type | Use the Type drop-down menu to select how time periods are organized in the editor. You will be able to choose from 3 different options:
The date type option you select will change the time span options available to you. |
| Data Mode | Use this option to specify the data mode displayed in the editor. |
| Monthly From / until |  These time span options will appear when you select Monthly from the Type drop-down menu. |
| Yearly From / until |  These time span options will appear when you select Yearly from the Type drop-down menu. |
| Monthly From / then yearly from / until |  These time span options will appear when you select Monthly & Yearly from the Type drop-down menu. |
Unit Settings
Convert currency and unit values displayed in the editor using these options.
| Option | Description |
|---|---|
| Currency | Use these two drop-down menus to select how currencies are displayed in the editor. 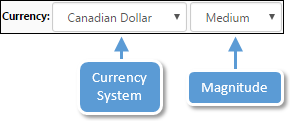 Use the first drop-down menu to select a currency system (Canadian dollar, British pound, ... etc.), and the second to select a magnitude. |
| Units | Use these two drop-down menus to select how variable values will be displayed in the editor. 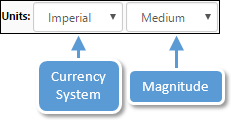 Use the first drop-down menu to select a unit system (Imperial or Metric), and the second to select a magnitude. |
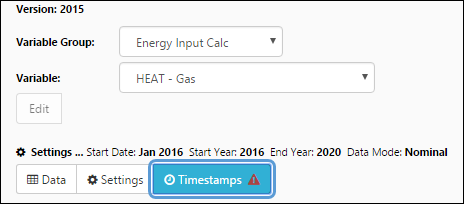
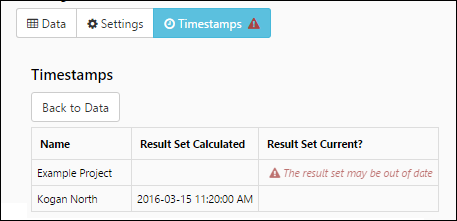
Review Timestamps
Using timestamp information you will be able to verify that the result set displayed in the Data table is up-to-date.
- Select Timestamps from the Navigation Ribbon.
- To resolve timestamp warnings, you will need to recalculate the values associated with each one of your projects using The Single Project Page.
Click image to expand or minimize.
Click image to expand or minimize.