
Use the Decline Manager to set up and run your decline calculations.
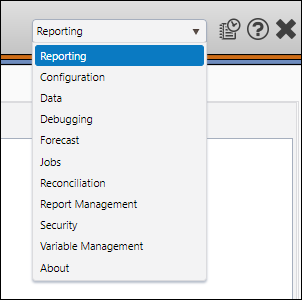
- Select Reporting from the Navigation Toolbar.
- Select Forecast from the Context drop-down menu in the Context/Report Selection pane.
- Click on the Forecast tab, and then the Decline Manager page.
Create a Decline
To create a decline, follow these steps:
- Select a version of your data using the Version drop-down menu in the Hierarchy/Version Selection pane.
- Use the Hierarchy to select the project you wish to create a decline for, and then add them to the manager by clicking on the level of your hierarchy that includes them.
- Select the project you wish to work with from the Project drop-down menu.
- Use the Variable drop-down menu to select the variable you wish to analyze.
- Configure your unit options:
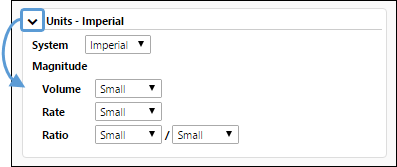
- Click the downward-facing chevron in the Units segment of the Display pane to reveal the unit options.
- Select a unit system (Imperial or Metric) using the System drop-down menu.
- Select magnitudes for Volume, Rate, and Ratio variable values using the Magnitude drop-down menu.
 You cannot modify your decline's unit settings while creating the decline, and will need to set up your unit options before clicking the Create button.
 - After setting up the system and magnitude options, click the Create button.
- Enter a name for your decline in the Decline field.
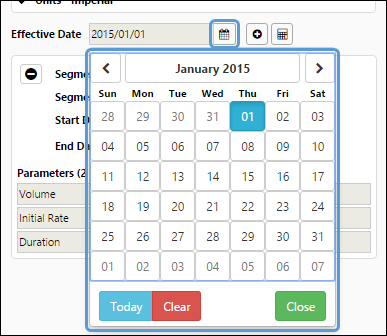
- Click on the Calendar icon (
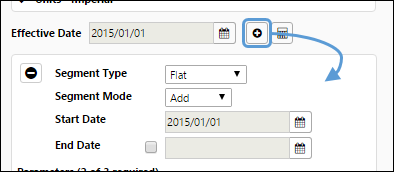
 ) and select an Effective Date for your decline.
 - Click on the Add icon (
 ). A new segment will be added to the Display pane.
 - Set up your decline's options:
- Segment Type: Use this option to select the type of calculation you intend to use.
- Segment Mode: Use this option to select how variable values will be used in the calculation.
- Start Date: Use this option to specify a start date for your calculations.
- End Date: To enable an end date, toggle the checkbox on the left side of the End Date field. Once this is done, clicking the Calendar icon will allow you to choose your end date.
- Set up your calculation:
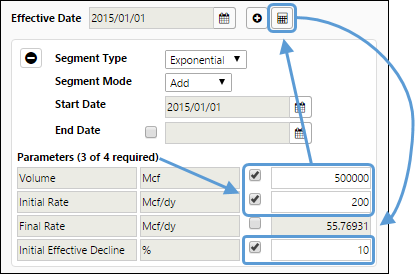
- Depending on the Segment Type you selected, a number of different variables will be listed. The minimum number of variable values required to calculate will be indicated above the parameters. In this example, an Exponential decline will be calculated, and requires three of four variables be entered manually in order to calculate.
- Toggle the checkboxes beside the variables that you have values for, and add your variable values to the fields.
- After you enter your variable values, click the Calculate button (
 ).
). - The remaining variable's value will be calculated.
Click image to expand or minimize.
- Click the Save button to save your decline.
Click image to expand or minimize.
Activate a Decline
Once you have created your declines, you will need to activate them before you can use data from your declines on The Single Project Page or The Multi Project Page.
- Select the version of your data that includes the decline you wish to activate using the Version drop-down menu in the Hierarchy/Version Selection pane.
- Use the Hierarchy to select the project associated with the decline you wish to activate and add it to the manager by selecting the appropriate level of the hierarchy.
- and then select the project from the Project drop-down menu near the top of the Display pane.
- Select the variable associated with the decline you wish to activate using the Variable drop-down menu.
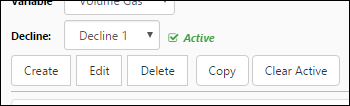
- Select the decline you wish to activate using the Decline drop-down menu.
- Click the Set Active button. You will be prompted when your decline has been successfully activated, and an active flag will be displayed beside the Decline drop-down menu.
Once you have activated declines, you can deactivate them by repeating steps 1-4, and then clicking the Clear Active button.
Edit a Decline
To modify a preexisting decline, follow these steps:
- Select the version of your data that contains the decline you wish to modify using the Version drop-down menu in the Hierarchy/Version Selection pane.
- Use the Hierarchy to select the project associated with the decline you wish to edit and add it to the manager by selecting the appropriate level of the hierarchy.
- Select the project you wish to work with from the Project drop-down menu.
- Select the variable associated with the decline you wish to edit using the Variable drop-down menu.
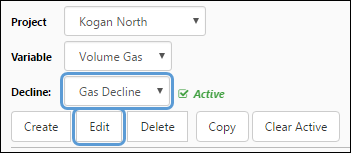
- Select the decline you wish to edit using the Decline drop-down menu.
- Click on the Edit button.
- Modify your decline as you would when creating it. You will be able to:
- Rename your decline
- Add new segments to your decline
- Modify dates associated with the decline
- Modify calculation options
- Modify calculation parameters
- When you have finished making changes to your decline, click the Save button to save your changes.
Copy a Decline
To make a copy of a preexisting decline, follow these steps:
- Select the version of your data that contains the decline you wish to copy using the Version drop-down menu in the Hierarchy/Version Selection pane.
- Use the Hierarchy to select the project associated with the decline you wish to copy and add it to the manager by selecting the appropriate level of the hierarchy.
- Select the project you wish to work with from the Project drop-down menu.
- Select the variable associated with the decline you wish to copy using the Variable drop-down menu.
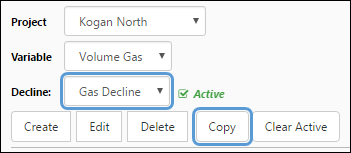
- Select the decline you wish to copy using the Decline drop-down menu.
- Click the Copy button.
- Enter a unique name for your copy in the Decline field.
- Click the Save button to save the copy.
Once copies of your declines have been created and saved, you can modify them as required.
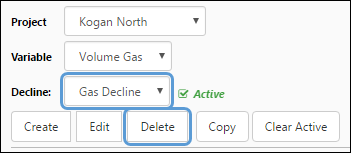
Delete a Decline
Delete a decline by following these steps:
- Select the version of your data that contains the decline you wish to delete using the Version drop-down menu in the Hierarchy/Version Selection pane.
- Use the Hierarchy to select the project associated with the decline you wish to delete and add it to the manager by selecting the appropriate level of the hierarchy.
- Select the project associated with the decline you wish to delete from the Project drop-down menu.
- Select the variable associated with the decline you wish to delete using the Variable drop-down menu.
- Select the decline you wish to delete using the Decline drop-down menu.
- Click the Delete button.
- You will be prompted to confirm the deletion. Click OK to delete the decline.
Modifying Decline Data
Once you have activated a decline, you can tweak calculation data using The Single Project Page.