Use the Autobalance page to do a mass balancing of the reservoirs. The list of reservoirs displayed on this page is dependent on what you have selected in the hierarchy. Only the reservoirs under the selected folder are displayed.
How to Access the Autobalance Page
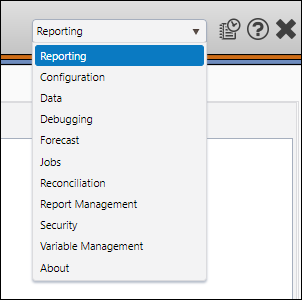
- Select Reporting from the Navigation Toolbar.
- Select Reconciliation from the Context drop-down menu in the Context/Report Selection pane. The Reconciliation tab will become available.
- Click on the Reconciliation tab, and then the Autobalance page.
Autobalance a Set of Reservoirs
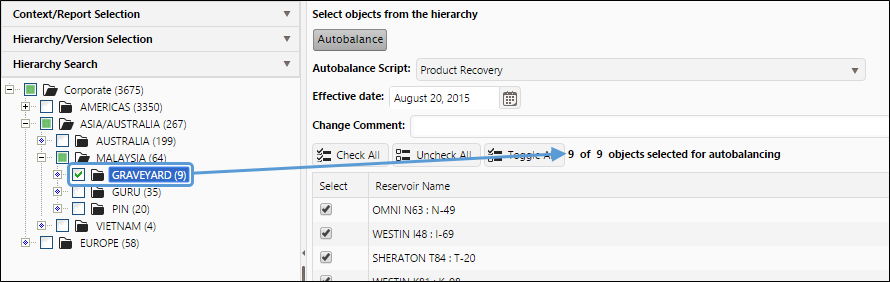
- In the Hierarchy/Version Selection pane, select the appropriate version of your data using the Version drop-down menu.
- Select a hierarchy to display your data from the Hierarchy drop-down menu in the Hierarchy/Version Selection pane.
- Using the Hierarchy, select the reservoirs you want to autobalance. Then, click on the level of your hierarchy containing the objects you selected.
- The objects you select will be added to the Display pane.
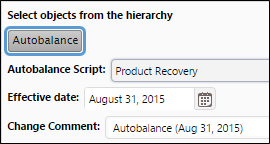
- In the Autobalance Script drop-down menu, select the script that you want to run.
- Set the effective date of your autobalance operation using the Effective Date field. Click the Calendar (
 ) button to open a calendar from which you can pick a date.
 - Use the Change Comment field to add comments that will be added to each object you autobalance.
- Use the toggles in the Select column of the table to select the reservoirs that you want to auto-balance.
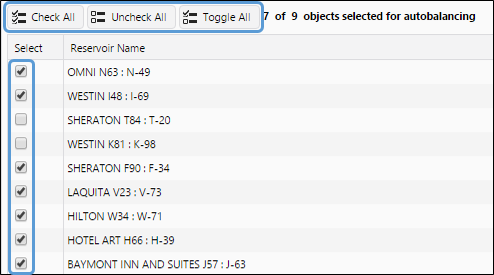
- When working with a large number of objects, the following buttons may assist you in specifying the reservoirs that you want to autobalance:
- Once you have narrowed your selection to those reservoirs that you wish to autobalance, click the Autobalance button.
- Autobalancing a large number of reservoirs can take some time. Monitor the progress of the autobalance operation on The Job Results Page.
Click image to expand or minimize.
The same script will be applied to all of the objects you have selected prior to running the autobalance operation.

Click image to expand or minimize.
 | Select all reservoirs from chosen hierarchy folder (default). |
 | Clear all checkboxes, then select only the ones you want. |
 | Toggle (reverse) all of the selection checkboxes. |