
Only one page is accessible via the Documents tab. Clicking on it will open the Document Manager page.
The Document Manager Page
Use the Document Manager page to upload files to (and retrieve files stored in) your Reserves database.
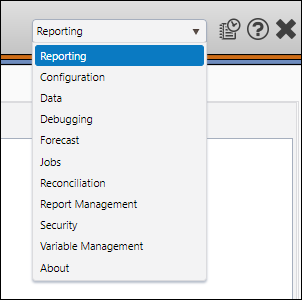
- Select Reporting from the Navigation Toolbar.
- Click on the Documents tab, and then the Document Manager page.
Upload a File
To upload a file, follow these steps:
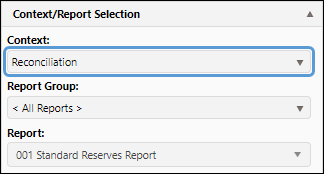
- Use the Context drop-down menu in the Context/Report Selection pane to select the context you want to add your file to.
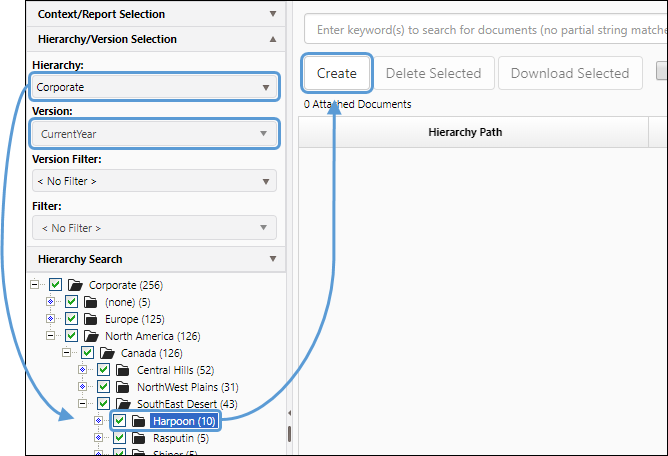
- Select the version of your data you wish to upload a file to using the Version drop-down menu in the Hierarchy/Version Selection pane.
- Select a hierarchy to organize your data using the Hierarchy drop-down menu in the Hierarchy/Version Selection pane.
- Select the object or node (folder) in the hierarchy you wish to link a file to.
- Click the Create button.
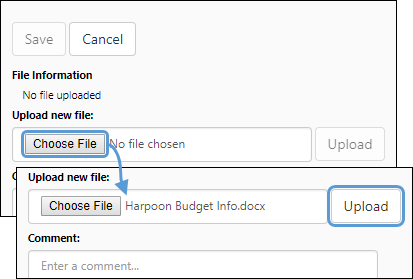
- Click the Choose File button.
- Use Explorer to locate the file you wish to upload, select it, and click the Open button.
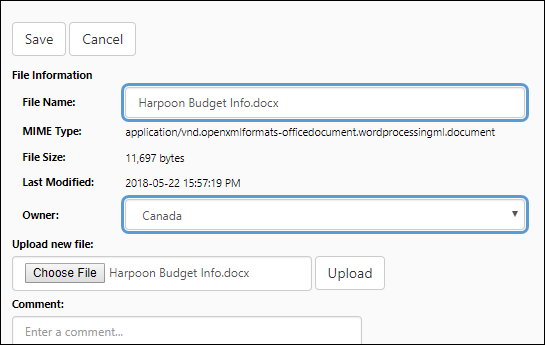
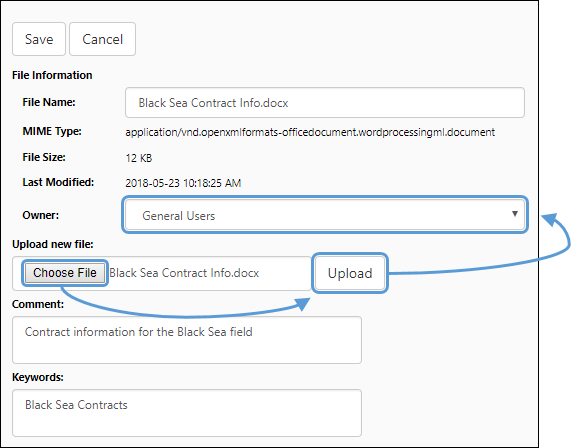
- Click the Upload button. The File Information section of the page will update.
- (Optional) Rename the file using the File Name Field.
- Select who will have access to the file using the Owner drop-down menu.
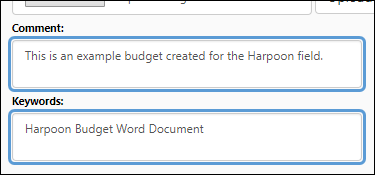
- (Optional) Add comments to the file in the Comment field.
- Tag the file with search keywords (separated with a space) using the Keywords field.
- Click the Save button to save the file.
Click image to expand or minimize.
Click image to expand or minimize.
Click image to expand or minimize.
View the File(s) Linked to a Node or Object in the Hierarchy
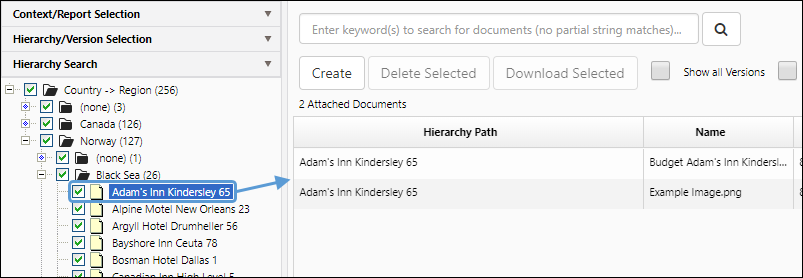
Any files linked to the node or object in the hierarchy that you select will be displayed in the table. In the example below, an object was selected. Only the files linked directly to the object are displayed.
Click image to expand or minimize.
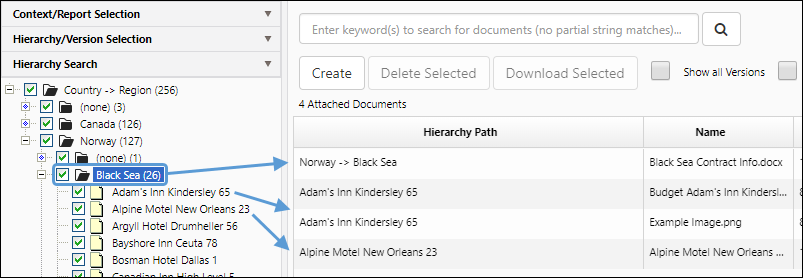
When a node is selected, files linked to the node, and any objects within the node will be displayed. In the example below, a file linked to the node is displayed, along with the files that have been linked to objects within the node.
Click image to expand or minimize.
When higher nodes are selected, files linked to any subnodes and/or objects within those subnodes will also be displayed.
Download One File
To download one of the files listed on screen, click the Download icon ( ) in the last column of the table. Your browser will download a copy of the file.

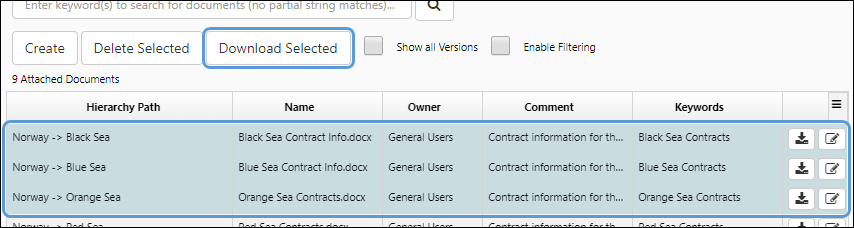
Download Multiple Files
You can download more than one document at a time by following these steps:
- While holding the CTRL or SHIFT keys on your keyboard, select the files you want to download.
- Click the Download Selected button.
- A .zip file will be downloaded that contains all of the files you downloaded.
Click image to expand or minimize.
Update a File
You can update a file by following these steps:
- Click the Edit icon (
 ) in the row associated with the file you wish to update.
 - Click the Choose File button and use the file explorer to select the latest version of the file.
- Click the Upload button.
- (Optional) Modify the file's name, comments, and/or keywords, as required.
- Click the Save button to save the file.
Click image to expand or minimize.
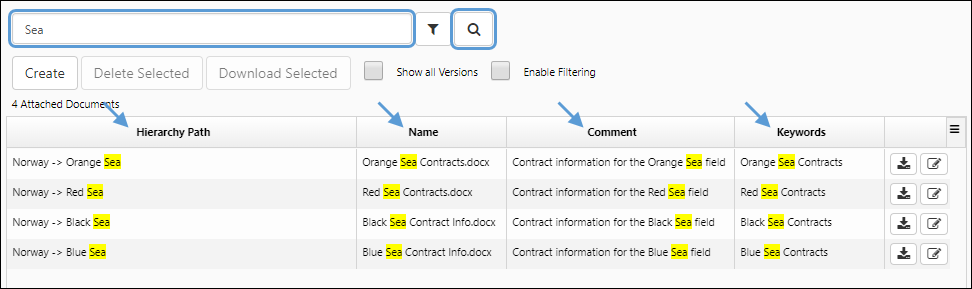
Search for Files
Use the search field near the top of the Display pane to search for stored documents. The search field will find matching whole words in the following columns:
- Hierarchy Path
- Name
- Comment
- Keywords
To search for files, enter your search terms in the search field near the top of the Display pane, and click the Search icon ( ). Matching results will be highlighted in the table.
Click image to expand or minimize.
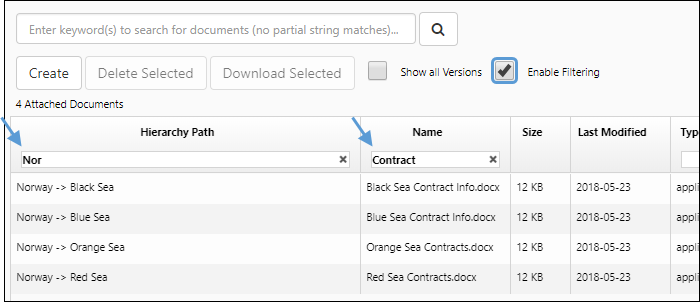
Enable Column Filtering
You can add filter fields to columns in the table (excluding the Size and Last Modified columns) by enabling the Enable Filtering checkbox. Filter fields can be used to further narrow your search results. Items that don't match the values you enter in a filter field will be hidden.
Click image to expand or minimize.
Sort Values in Columns
You can sort the values in a column alphabetically by clicking on the column's header cell. Click again to reverse-sort the values in the column. Clicking a third time will turn off column sorting.
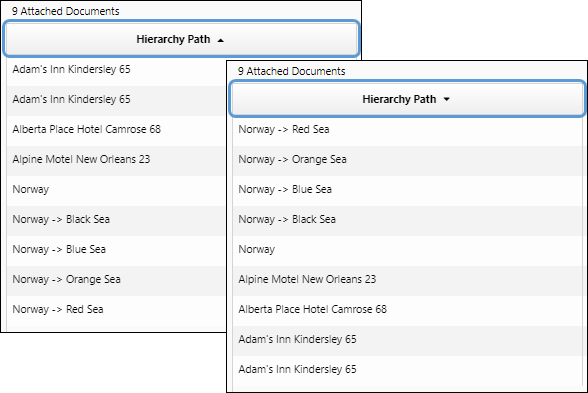
Click image to expand or minimize.
Additionally, you can sort the values in multiple columns at the same time. To do this, hold the SHIFT key while selecting header cells. Columns will be sorted in the order they are selected.

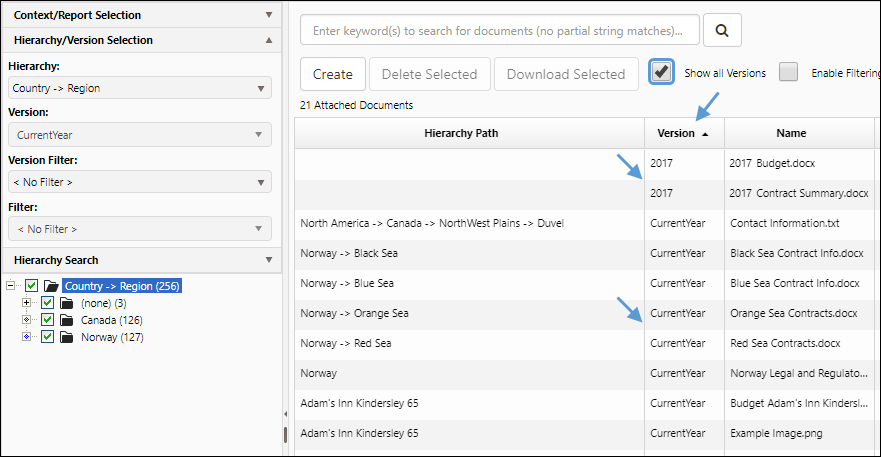
View Documents in Multiple Versions (Power Users Only)
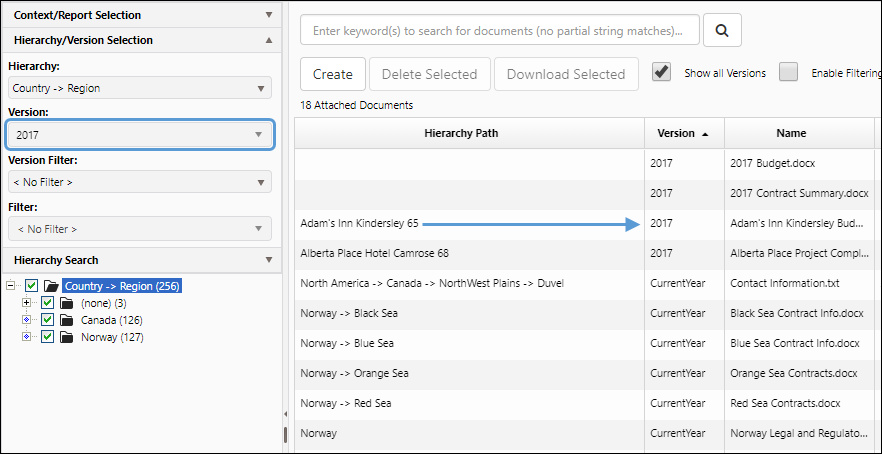
You can view files linked to nodes that exist in multiple versions, at the same time. When you enable the Show all Versions checkbox, in addition to files linked to nodes in your active version (selected using the Version drop-down menu in the Hierarchy/Version Selection pane), files attached to any nodes from the current version that also exist in other versions will be displayed.
Enable the Show all Versions checkbox near the top of the Display pane. The Version column will be added to the table, and documents stored at the node level in other versions will be displayed.
Click image to expand or minimize.
Click image to expand or minimize.
Edit an Uploaded File's Options
You can edit the options associated with uploaded files by following these steps:
- Click the Edit icon (
 ) in the row that corresponds with the file you wish to modify.
 - Modify your file's options as you would when uploading it.
- Click the Save button when you have finished making your changes.
Delete an Uploaded File
To delete a document, follow these steps:
- Select the document you wish to delete.
- Click the Delete Selected button.
- You will be prompted to confirm the deletion. Click OK to delete your file(s).