
Groups make reporting more flexible by allowing you to narrow the focus of a report to a reserves group you create. Use the Groups page to manage your reserves groups.
How to Access the Groups Page
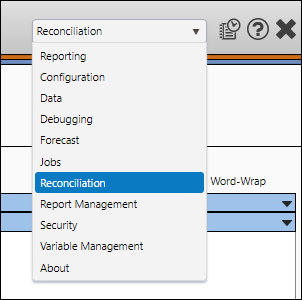
- Select Reconciliation from the Navigation Toolbar.
- Click on the Configuration tab, and then the Groups page.
Create a Reserves Group
To create a reserves group, follow these steps:
- Use the Group Type drop-down menu to select the type of group you want to create. You will be able to choose between three different group types:
- Reserve Category
- Change Category
- Product
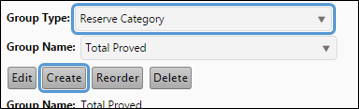
- Click the Create button.
- Enter a name for your group in the Group Name field. Remember this name. You will need to select this name from The Report Options Page later on to use this group for reporting purposes.
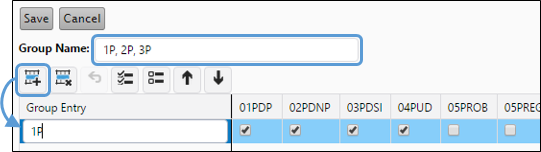
- Click the Add (
 ) button.
 - Double-click the cell in the Group Entry column of the table to rename the entry.
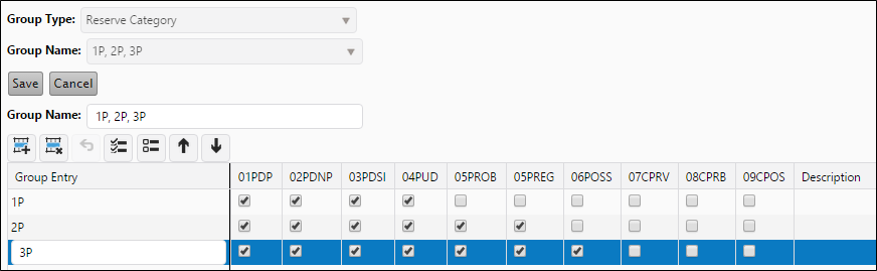
- Use the checkboxes to select change categories, reservoir categories, or products (depending on the type of group you are creating). An example of a completed reserves group list is visible below.
- While configuring your groups:
- Click the Select All (
 ) button to select all the checkboxes in a selected row.
 - Click the Deselect All (
 ) button to clear all the checkboxes in a selected row.
 - Click the Delete Row (
 ) button to remove the selected row.
- Click the Select All (
- Continue adding rows until all the variables you need are included in the Group Entry column.
- Click the Save button when you have finished configuring your group.
When you eventually run a report using a group, the report will only display the variables listed in the Group Entry column (visible above).
Click image to expand or minimize.
Edit a Reserves Group
To modify a preexisting reserves group, follow these steps:
- Select the Group Type to which the reserves group to edit belongs.
- Select the Group Name you want to change.
- Click the Edit button.
- Make changes, as required.
- Change the name of the group.
- Add another row by clicking the Add () button.
- Change the checkbox selections by selecting or clearing the options you decide.
- Delete a row from the group by clicking in the row, then clicking the Delete () button.
- When you have finished making changes to your group, click the Save button.
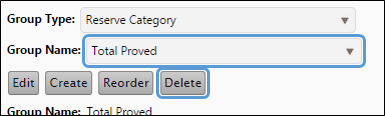
Delete a Reserves Group
To delete a reserves group, follow these steps:
- Use the Group Type drop-down menu to select the reserves group type of the group you intend to delete.
- Use the Group Name drop-down menu to select the group you want to delete.
- Click the Delete button.
- You will be prompted to confirm the deletion.
- Click OK to delete the group.
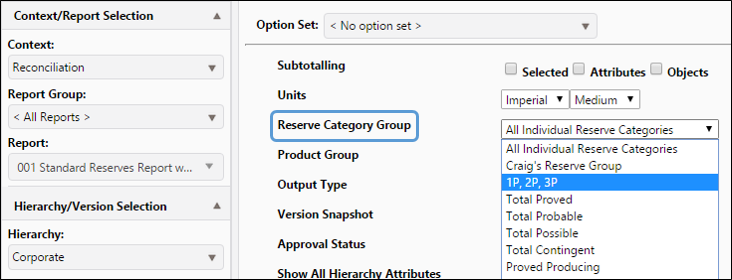
Running a Report with a Group Restriction
Certain reports will allow you to select a group to narrow the focus of the report. Access The Report Options Page to select a group.
- Depending on the report type you selected, there will be up to three of the following drop-down menus available in the Display pane.
- Change Category Group
- Reserve Category Group
- Product Group
- Select the group(s) you wish to use for the report. In the example below a Reserve Category Group was selected.
Click image to expand or minimize.