Load data into a reconciliation
After you have created a reconciliation, you need to load data into it from Planning Space Dataflow:
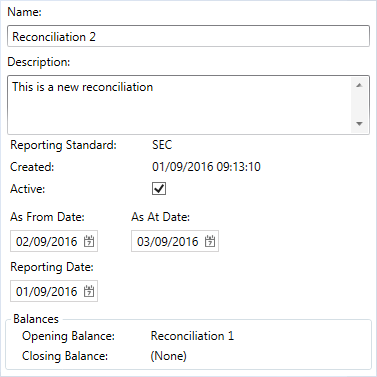
- Select the reconciliation on the left-hand side of the screen so that it is displayed as shown below.
- Click the Load Data button
 in the Manage Reconciliations tab on the ribbon and the Load Data window will be displayed. The From ... to ... dates at the top are taken from the As From Date and As At Date fields in the reconciliation. Since this reconciliation is based on another one, the As From Date field was automatically filled in based on settings of the parent reconciliation.
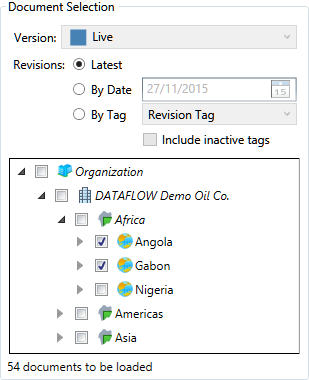
 - In the Document Selection section, choose where reserves data will come from. Select a hierarchy version and a document's revision; revisions can be selected based on date or tag. Check boxes next to documents you want to load; use right-click for more selection options. When documents are selected, the amount of documents expected to be loaded will be displayed underneath this section. Nodes in the hierarchy not included in the mapping template will be grayed.
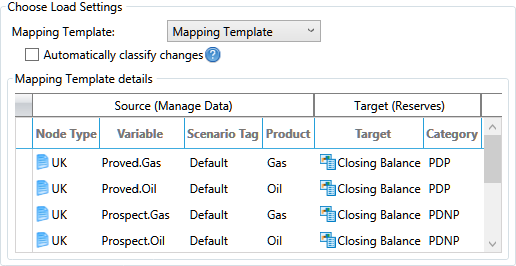
- In the Choose Load Settings section, select a mapping template. Mapping templates establish correspondence between variables in the Manage Data workspace and data in the Reserves workspace; they are created and managed in the Reserves Configuration workspace (see Mapping templates). The list of templates shows only those templates which have the same reporting standard as the opened reconciliation.
- Check the Automatically classify changes box to automatically assign loaded values to reconciliation reasons based on document history and reserves change reasons specified in the Manage Data workspace (see Save a document). If you are re-loading data, checking this box will overwrite changes to reconciliation reasons you may already have made.
- The Mapping Template section contains mapped reserves and economic variables and is for reference only; to edit mappings, you need to have access to the Reserves Configuration workspace. It shows which variables in which hierarchy nodes will be loaded into reserves product types and reserves categories.
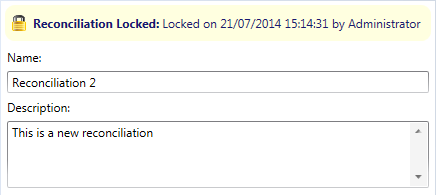
- Click the Load button. While the values are being loaded, the reconciliation will be temporarily locked and a message will be displayed as shown below.
- The task notification area at the bottom of the screen will show the progress of the operation. If there are any problems, you can open the log as shown below and investigate.
- Once data loading finishes successfully, the reconciliation is ready to use. Double-click it to open it and start the reconciliation process (see Reconcile data).

Note: If you are not allowed to view a particular document or hierarchy version in the Manage Data workspace, you will have the same restrictions here.
Note: The first time data is loaded into a reconciliation, you are able to select which version the data comes from. If data is updated with another load, you are unable to change the version and must load from the original version set.


Note: If you want to load both the opening and closing balance, they must be loaded from the same hierarchy version for the automatic classification to work. If versions do not match, you will receive a warning.


Note: You are automatically granted access permissions to any nodes that have been newly-created by your load.
