DATAFLOW loading screen
This screen opens when you add a DATAFLOW data source, based on connection to a PlanningSpace server and tenant. For instructions on how to load data, see Load data from PalantirDATAFLOW™.
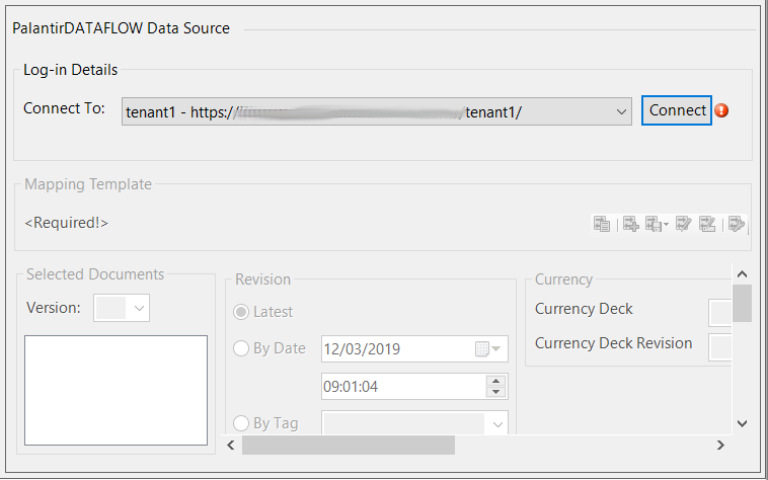
When there is no data source connection, most of the screen will be inactive and you will see something like:

Select the tenant for connection and click the Connect button (if the required server and tenant is not listed, you can add it manually using the Manage Connections option).
You will now see a login dialog Sign in to your account. If your PlanningSpace account has a Username and Password that are specific to PlanningSpace, type these into the dialog and click Sign in. If your account has a Windows UPN identifier (something like 'first.lastname@domain.mycompany.com') as the Username, type this in but leave the Password blank; you will see a second dialog generated by an Identity Provider server, in which you may be required to select one of several federated accounts, and you may be requested to enter your federated password (the details depend on how the PlanningSpace user authentication is configured). Note: if you check the Remember me box then your Username will be remembered for the next connection at the same PlanningSpace tenant.
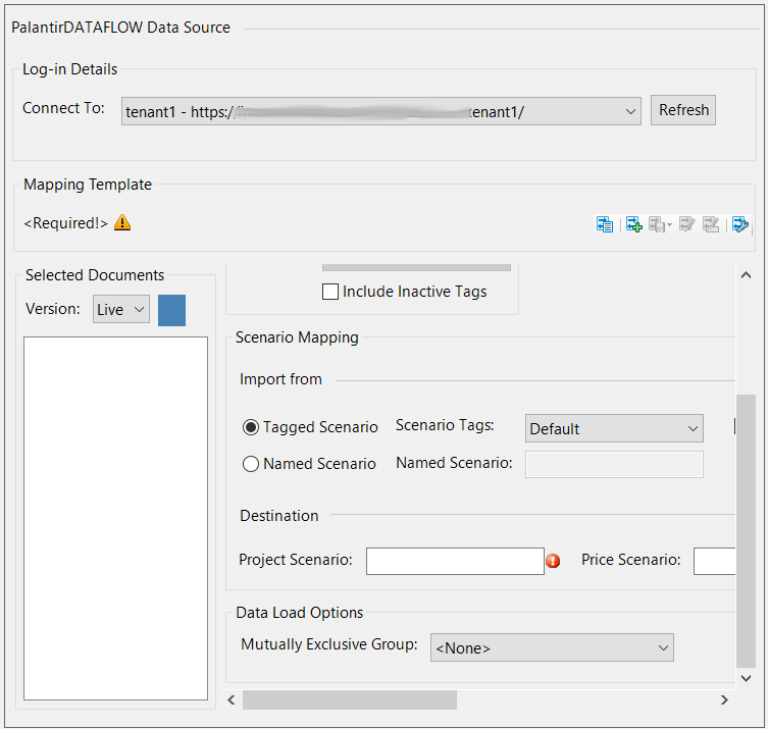
If the connection is successful, you will see:

The following table describes the different input fields.
| Field | Description |
|---|---|
| Connect To | Click the down arrow to select the PlanningSpace server and tenant where your DATAFLOW projects are stored. The list will be automatically filled with available tenants based on the server used by your CX Suite applications. To specify a connection manually, select the Manage Connections option on the list. |
| Connect | Click this button to connect to the selected PlanningSpace tenant. |
| Refresh | Click to refresh the |
| Mapping Template | Select or create a mapping template (buttons are described below); for instructions, see DATAFLOW mapping template. The name of the currently selected template and the time when it was applied are shown on the left-hand side. |
| Selected Documents | Select the version of the |
| Revision | Select the document revision to be loaded. You can load the latest revision, or choose a specific one based on tags or date and time. |
| Currency | Select the currency deck and its revision for loaded |
| Import From | Select Tagged Scenario to import from a document scenario with a particular tag; this would only import documents that have a scenario tagged with selected tag. To import from a document scenario with a particular name, select the Named Scenario option and enter the name in the text box. |
| Destination | Select or enter project and price scenarios for use in |
| Mutually Exclusive Group |
Determines the field by which projects will be grouped when data is loaded and optimization takes place. All projects in a Mutually Exclusive group (MEG) must have the same project type; PLAN assumes that the project type for the first project in an MEG is the default project type for the whole MEG. For more information, see Mutually Exclusive Groups. Note: If projects of a different type are detected in the data load, they will be removed from the MEG, and a warning message will be displayed when navigating to the |
The table below describes the template management buttons.
| Button | Function |
|---|---|

|
Opens the list of existing templates where you can select a template to be used for import. |

|
Creates a new template. |

|
Saves the currently selected template on your computer. If you click on the arrow, you can choose to replace an existing template, or to save under a different name. |

|
Opens a window where you can edit the currently selected template. |

|
Renames the selected template. |

|
Opens a window where you can manage existing templates (see Manage mapping templates). |