Using Tibco Spotfire as a client
Note: For compatibility with the information below, you must be using Spotfire 7.0 onwards with Spotfire Connectors hotfix 4.0_HF-008.
Spotfire can easily access OData sources using its built-in OData connector.
Setting up an OData feed
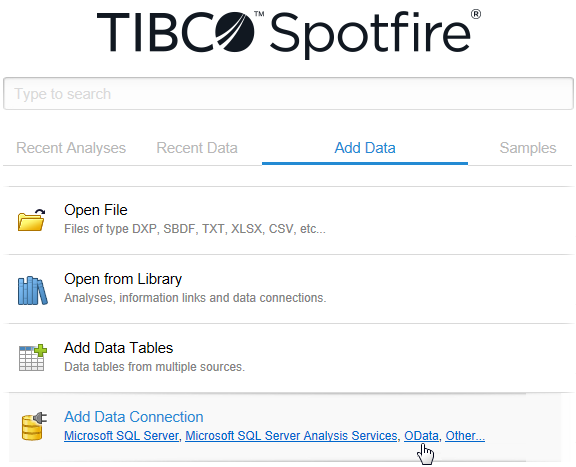
- Launch TIBCO Spotfire. On the home screen, navigate to the Add Data tab.
- Under Add Data Connection, click OData.
- The OData Connection window will open. Enter the URL for your OData query and credentials that correspond to a valid PlanningSpace user, or using an API Key (for details, see Authentication for OData).
- The View in Connection window will open, displaying the data sources that are available to load.
- The Add Data Tables window will open.
- When you have finished configuring your data tables, click OK to load your data.
- When the load operation successfully completes, the loaded data will become available for visualizations.
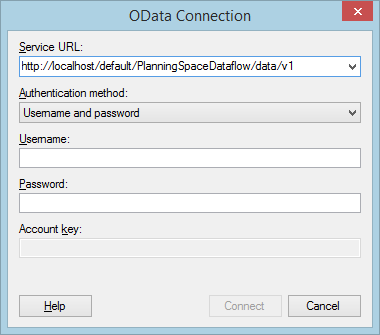
For version 16.5 Update 7 and later: A Windows authentication mode is available for SAML2-type user accounts; see Windows Authentication for OData. Select Windows authentication in the Authentication method field in this case. (Note: Spotfire's connector doesn't support Windows authentication completely since it is not possible to implicitly invoke the current Windows user credentials.)
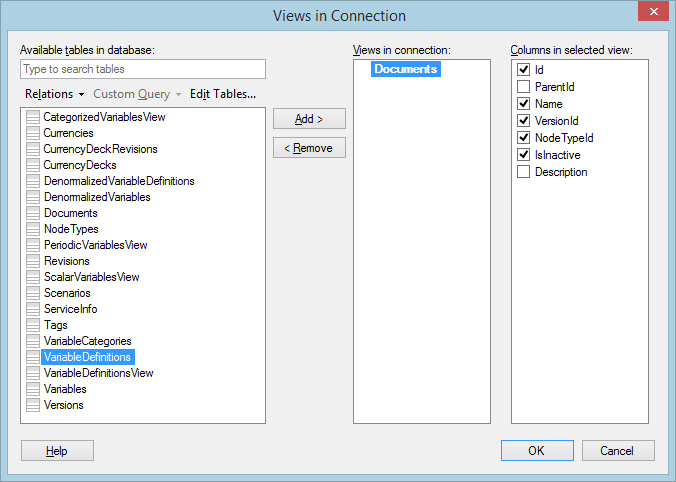
To add a source to the load, select it and click Add. A list of the available column headings (configurable by clicking Edit Tables…) within the selected source will be displayed in the Columns in selected view panel; check the boxes of those you want to include.
To remove a data source, select it from the Views in Connection panel and click Remove.
Clicking the Relations drop-down allows you to create relations between separate entities that effectively combines them together into a single entity set.
Once you have added your sources and specified the columns to display, click OK.
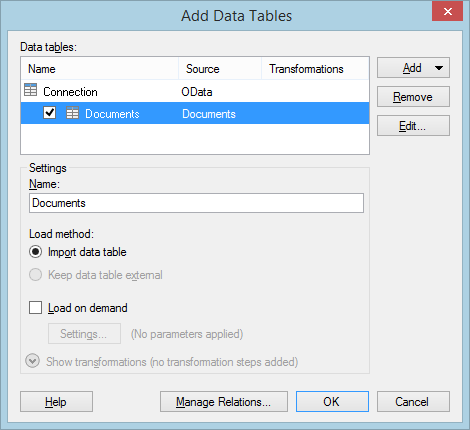
To add and remove data sources, use the Add or Remove buttons. To make any other adjustments to your data sources, click Edit….
The Load on demand setting is used to specify whether all of your data is loaded at once, or whether only certain parts are loaded using conditions. This setting is useful if your data source contains large amounts of data.
If you have added two data sources, clicking Manage Relations allows you to configure relations between them. This is necessary if you want to set up a visualization that combines data from another source.
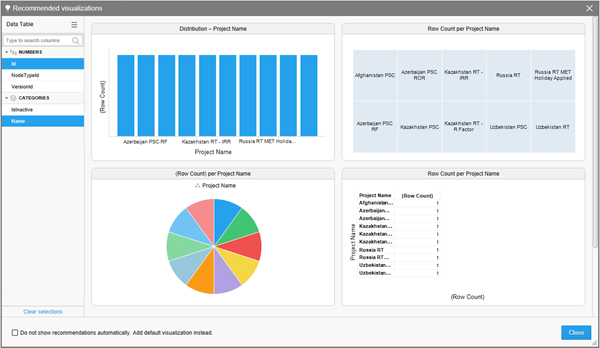
To insert additional data, navigate to Insert>Rows. In the window that opens, click Select and then OData. From there you can repeat the steps outlined above to insert additional data. It is also possible to create visualizations that utilize multiple entities by adding relations (see below).
Adding Relations
Relations are used to combine data from different entities in your data source into a single visualization in Spotfire, which in turn can be used to create a data table.
To add a relation between two entities:
- Load your data. On the Views in Connection page, click Relations and select New Relation…
- The New Relation window will open. Using the drop-downs to select the common column that will link them, set the Foreign key table and Primary key table to the two entity sets you want to link. Finally, click OK
- In the example below, the NodeTypeId and Id will be used to link the Documents and NodeTypes entities together (note that NodeTypeId and Id will bear the same values, given the respective entities that they belong to).
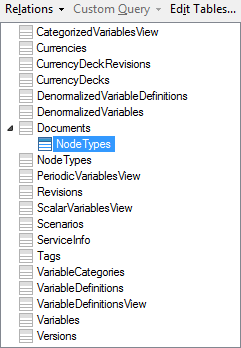
- The newly-created relation will now appear in the Views in Connection window, inside the entity that you have set as the Foreign key table; its name will be the same as the entity you have specified for the Primary key table.
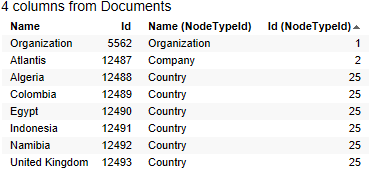
- To add the relation to the load, add its parent entity. In the Columns in selected view panel, the table headings for both entities will be available, with table headings belonging to the child entity indicated within brackets. Specify the column headings you want to include and click OK.
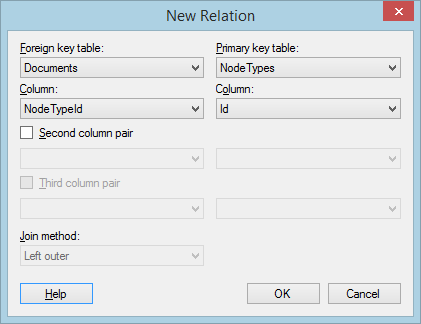
Note: To join entities with multiple columns, use the Second column pair and Third column pair drop-downs.
Now when your data is loaded, you will be able to add a single visualization that includes both entities.
Server restrictions for queries on 'AllScalarVariablesWide' and 'AllPeriodicVariablesWide'
OData queries to the 'all variables' properties can result in very large data downloads, which could overload the server and impact on all PlanningSpace users.
Important: OData feed queries for 'AllScalarVariablesWide' and 'AllPeriodicVariablesWide' which are unfiltered will only return partial result set data, for the 'Gross' partner and the first run of the result set. To retrieve all of the data an explicit filter must be used for specific partners or runs.