Tenant workgroups
Workgroups are used to control users' access to functions and configuration settings in the tenant, most of these functions are application-specific while a few are common to all of the PlanningSpace applications.
You can add or remove user accounts from membership of a workgroup using the Workgroups interface.
The effects of belonging to a workgroup are determined by the roles that a workgroup is allowed to use. These role permissions are set in the Tenant roles management interface.
Two workgroups are created by default for a new tenant:
- Administrators: this workgroup has access to all functions and all configuration settings for the tenant. By default, only Administrators can create or manage the user accounts, workgroups and roles of the tenant (but these roles can also be assigned to new workgroups). An initial administrator user with login ID 'Administrator' and password 'Administrator' is always created when a new tenant is created, and this is the only initial means for tenant administration
- Everyone: all users are automatically members of this workgroup. By modifying the roles which Everyone is assigned to, you can control which features of the PlanningSpace applications are made 'public' and available to all users.
To access workgroup management for a tenant, you need to login as a tenant administrator user and launch any one of the PlanningSpace client applications. Click 'Workgroups' in the client Navigation pane, or 'Workgroups' in the Security workspace top menu.

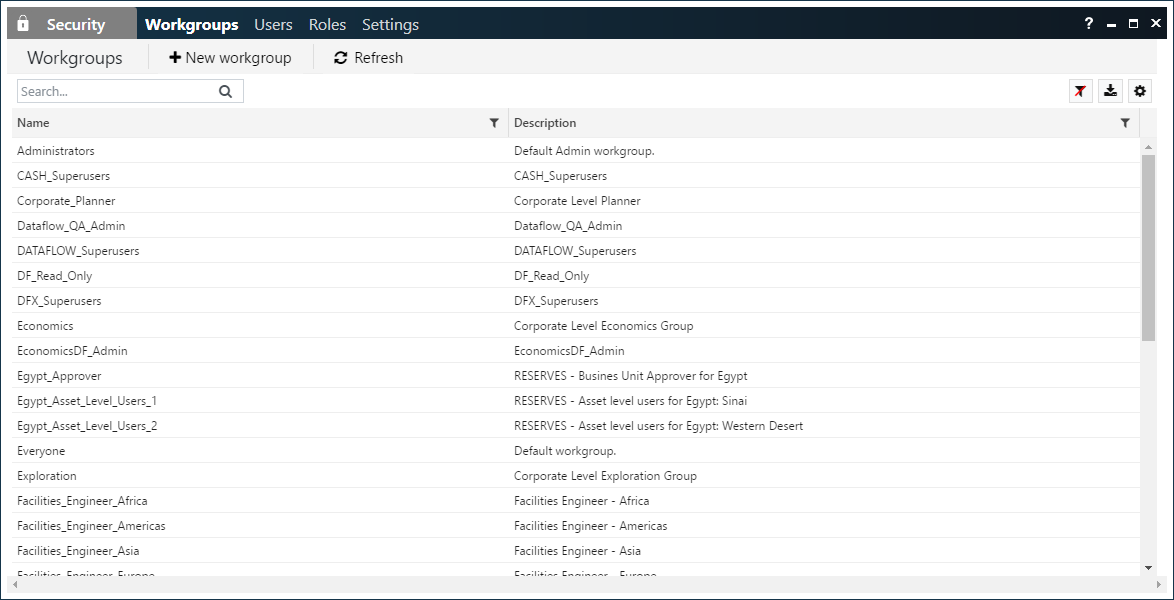
You will see the names and descriptions of the existing workgroups for the tenant.
Create a new workgroup
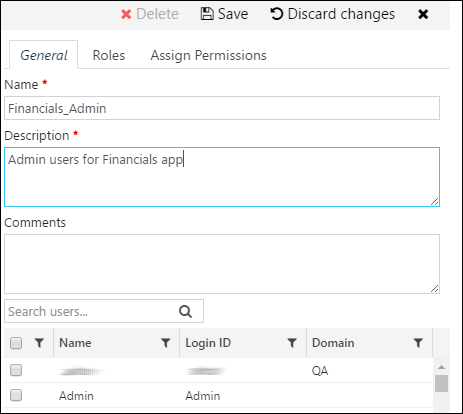
Click the 'New workgroup' button to create a new workgroup:

In the edit pane, type in a name, a short description, and an optional comment. Workgroup names can only contain alphanumeric characters, underscores (no spaces), and full stops; names can be up to 128 characters and must start with a letter. Workgroup names cannot be changed.
Workgroup members: Use the tick boxes next to the user account names to set the initial user membership of the workgroup.
Click the 'Save' button to create the new workgroup.
Edit a workgroup
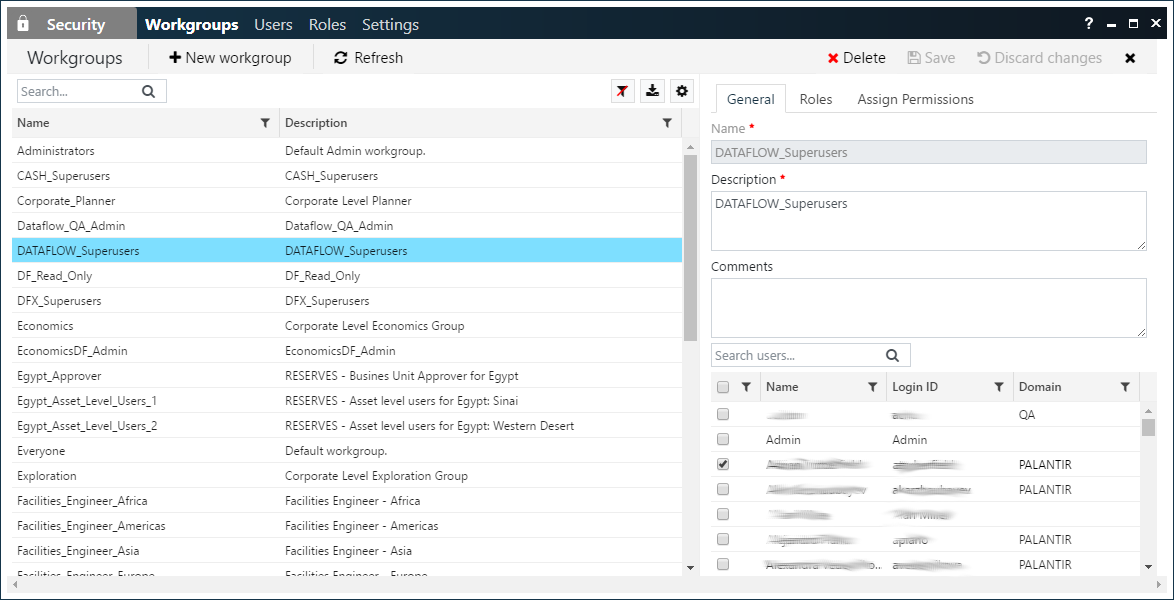
To edit the settings for an existing workgroup, click a workgroup name to open its edit pane. For example:

The workgroup that is being edited will be highlighted in blue. Click the 'X' button at the top right corner to close the edit pane.
There are two control buttons, which become activated when you have made an edit. Click the 'Save' button to save the changes that you have made. Click the 'Discard changes' button to undo any unsaved changes.
'General' tab: Use the tick boxes next to the user account names to add or remove user members of the workgroup. You can also edit the Description.
'Roles' tab: Modify which roles this workgroup is allowed or denied (see Tenant roles).
Assign entity-level permissions for a workgroup
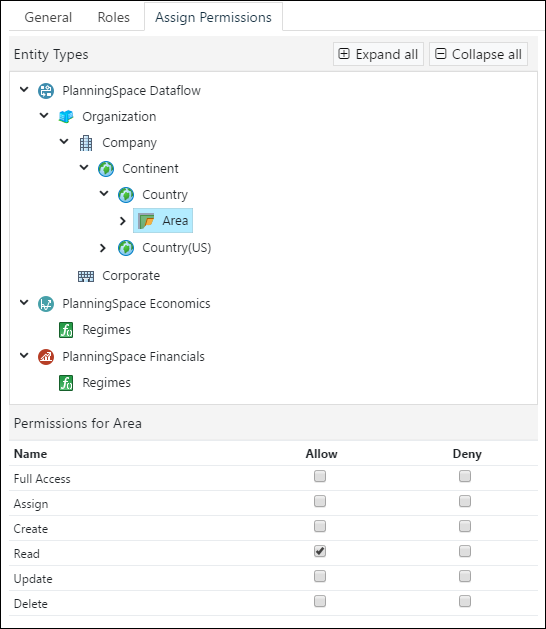
It is possible to edit the entity-level permissions for hierachies (Dataflow) and regimes (Economics and Financials).
Click a workgroup name to open its edit pane, and click the 'Assign Permissions' tab:

See Access permissions (entity-level) for hierarchies and regimes for explanation of the entity-level permissions.
Delete a workgroup
To delete a workgroup: click a workgroup name and click the 'Delete' button
 .
.
Then click 'Delete' in the confirmation dialog.
