
Integration Agent
The Execute Integration Agent is a service which can be installed on an on-prem server to enable integrations between cloud-based deployments of Execute and on-prem systems. The integration agent is never used for instances of Execute installed on client managed infrastructure.
Supported Integrations
The integration is newly introduced and does not yet support all of the integration points that are available to on-prem Execute instances.
The following integrations work in hosted environments without requiring the Integration Agent:
- Peloton Saas
- WellEz
- APIs
- OData
- Enersight
The integration agent does support the following integrations:
- Data Synchronization
- Data Selection/Table Data Selection, etc.
- Table/View Based Sync of Actuals and Field Estimates
- Database Document Export (QByte and Envision)
- Enterprise Events
- Value Navigator
The integration agent does not currently support the following integrations:
- Direct-to-DB Access/Reporting
- Enterprise Numbering
- Enterprise Validation
- Peloton on-prem (there are no plans to support this from cloud-based Execute)
- Approval Snapshot
Installation
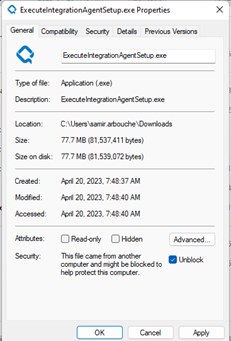
The integration agent is packaged with Execute and distributed as a separate installer: ExecuteIntegrationAgentSetup.exe
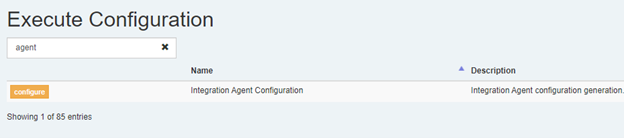
You can download the agent installer from Execute > Tools > Configuration.

Once you download the installer file, your Windows system might block the file from running since it is an executable download from a web page.
To unblock the file:
- Right-click on the file and check the box 'Unblock'.
- Or, from a PowerShell window: run > unblock-file*
It is possible to install multiple copies of the Integration Agent on a single machine to support multiple environments (such as PROD and TEST). These copies must be installed to separate folders, however (i.e., C:\Execute\InegrationAgent\PROD).
All configuration will be stored in the config sub-folder.
Configuring the Connection to Execute
The first step when configuring the Integration Agent is to bind it to the appropriate instance of Execute. To do this, login to Execute as an administrator (with Integration Agent privilege) and navigate to Tools > Configuration > Integration Agent Configuration.
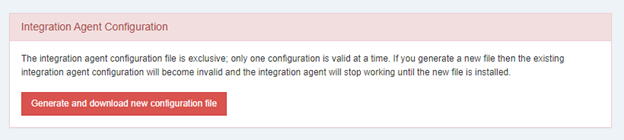
Here you can download connection.config, which must be pasted into the config folder for your instance of the Integration Agent.
Installing the Service
The agent installer needs to be run as an administrator user (ideally, the same user who will be running the service).
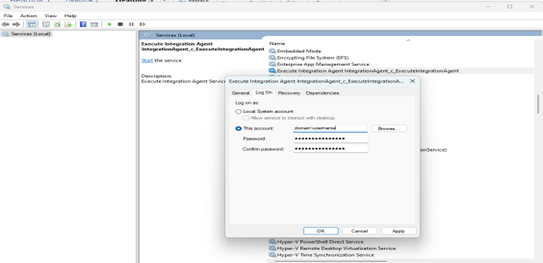
- If you are encrypting the connection strings, then you cannot use the (LocalSystem) account. Instead, use a local user with admin privileges (domain\user). You will need to enter the user credentials of this user into the "Services Manager".
- If you already have an agent installed: 1.0.52 or earlier version, you can install at the same root folder location and the new version will make use of the existing config file.
- Stop this old service version before running the installer.
- Run the agent installer and follow the instructions from the UI prompts.
Once the installation is completed successfully the service is registered. The Integration Agent service can be stopped, restarted, and started through the Windows Service control panel.
Testing the Service
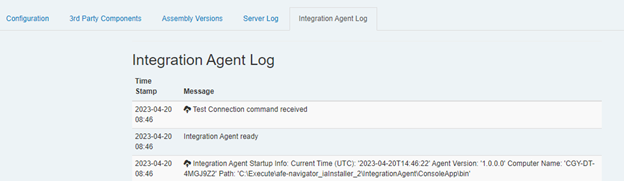
Navigate to Help > About > [Test Agent] button. Here you can test the status of the linked Integration agent. By navigating to Help > About > 'Integration Agent Log' Tab, you can get more information logs about the status of the linked integration agent.
Upgrades
Manual upgrade of the Integration Agent is no longer required. The Integration Agent is now included in each Execute release and upgrades will happen automatically when the agent detects an updated version of Execute has been deployed.
Uninstall
To unregister the Installation Agent (required when uninstalling the integration agent completely, or when moving folders), you can use the Uninstall.exe available in the installation folder(root). This will remove the windows service only (will not delete files).
Once the service has been unregistered (and any configuration backed up), it is safe to remove the Integration Agent folder.
Defining Database Connections
To support integration between cloud-based Execute and on-prem database, you can add database connections to the databaseConnections.config file (on initial setup, copy databaseConnections.config.sample to databaseConnections.config).
Here is an example connection for a SQL Database. It is named “ACCOUNTING” can can be referred to by integration jobs using the name “ACCOUNTING”.
<connection>
<name>ACCOUNTING</name>
<type>SqlServerProvider</type>
<connectionString>Data Source=localhost;Initial Catalog=syncdata;User ID=sa;Password=123213123!</connectionString>
</connection>
The databaseConnections.config file may contain any number of database connections to Oracle or SQL Server databases.
Restart the Integration Agent after making changes to the databaseConnections.config file.
Configuring Table Replicas
The Table Replica feature allows copying data from a table/view/query from an on-prem system into Execute. This is useful for Data Selections, and synchronizations that bind Execute data with external data.
To setup a table replication, add a connection for the source database (in the Integration Agent – above).
Next, copy plugins_available\integration\replication\replicate_query_to_execute.config.sample to plugins\replicate_TABLENAME.config.
Update the settings in the configuration to give that sync job a name, configure which database connection to use, set the name of the target table in Execute, and the query to run. In addition, configuration supports enabling manual sync and scheduled sync.
<!-- The name for this table replica (shows in Synchronization menu) -->
<jobName_{##UNIQUE##}>Sync AFE Closed Table</jobName_{##UNIQUE##}>
<!-- The query will run against the DB referenced by this name -->
<connection_{##UNIQUE##}>SYNC</connection_{##UNIQUE##}>
<!-- Selects the data to be copied to a table on the service DB -->
<baseQuery_{##UNIQUE##}>
<![CDATA[
select * from afe_closed
]]>
</baseQuery_{##UNIQUE##}>
<!-- The name of the table that will store replicated data -->
<tableName_{##UNIQUE##}>AFE_CLOSED</tableName_{##UNIQUE##}>
<!-- Whether the job can be run manually -->
<supportsManual_{##UNIQUE##}>true</supportsManual_{##UNIQUE##}>
<schedule_{##UNIQUE##}>month=*:date=*:dayOfWeek=1,2,3,4,5:hour=0:minute=0</schedule_{##UNIQUE##}>
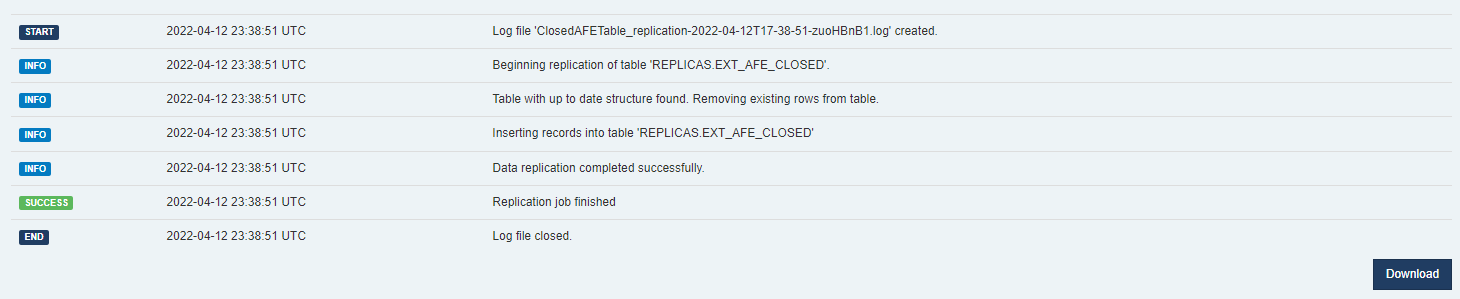
Manually running a Table Replication job will produce a log like the following:
Defining Document Synchronizations
The Integration Agent supports Document Synchronizations against named connections (defined in databaseConnections.config on the Integration Agent).
To configure a synchronization plugin to use the integration agent, find the <ConnectionString> line and update the “ConnectionList” property to “IntegrationAgent” and the “Id” the name of the connection in your “databaseConnections.config” file.
<ConnectionString>Connection List= IntegrationAgent; Id=SYNC</ConnectionString>
Troubleshooting
Unknown Database Connection
An error like the following would indicated that the named database connection is invalid.

To resolve:
- Double check the contents of databaseConnections.config (taking care that names match exactly).
- Try restarting the Integration Agent service to see if that resolves the issue.
Is the service running?
If Execute is unable to contact the Integration Agent you may see messages like the following in the log.

To troubleshoot connectivity between the Integration Agent and Execute.
-
Verify that connection.config is found in your services
configfolder. - Verify that the service Execute Integration Agent ($path) is visible in the Windows Services control panel and is “Running”.
- Log for log messages in the logs folder in the Integration Agent folder.
- Review the Execute logs (Help > About > Server Log) for messages.
- Try the Test button on the Help > About page.